2. Quick Start
Software engineering is what happens to programming when you add time, and other programmers. – Russ Cox
This chapter introduces a few basic concepts in Go. After reading and practicing the examples in this chapter, you should be able to write simple Go programs. The next three sections review the “hello world” program from the previous chapter. Later, we will discuss a few more basic concepts in Go. We will learn about data types, variables, comments, for loops, range clauses, if statements, functions, operators, slices, and maps.
2.1. Hello World!
The following code is the “hello world” program from the previous
chapter. You can type it into your favorite text editor and save it as
hello.go. When you run the program, it will print the message
Hello, World! to your console or terminal.
1package main
2
3import "fmt"
4
5func main() {
6    fmt.Println("Hello, World!")
7}
You can open your command line program and run the above program like this:
$ go run hello.go
Hello, World!
The text you wrote in the hello.go file is a structured document.
The characters, words, spaces, line breaks, and punctuation marks used
are all important. In fact, we followed the “syntax” of the Go
programming language. According to Wikipedia, the syntax of a computer
language is the set of rules that defines the combinations of symbols
that are considered to be a correctly structured document or fragment in
that language.
The go run command is convenient for developing programs. However,
when you want to use the program in a production environment, it is
better to create executable binaries. The next section will briefly
explain how to build executable binaries and run them.
2.2. Building and Running Programs
The go build command can be used to compile source code into
executable binary programs. These executable programs can be run
directly or copied to other similar systems and run there.
To compile (build) the hello world program, you can use the following command:
$ go build hello.go
The go build command produces an executable file named hello in
the current directory. This program can be run in a GNU/Linux system as
follows. The ./ at the beginning of the command ensures that the
hello program is run from the current directory.
$ ./hello
Hello, World!
In Windows, the executable file has the extension .exe. Here is how
you can run the executable file on a Windows system:
C:\> hello.exe
Hello, World!
The go build command produces a binary file that is native to the
operating system and the architecture of the CPU. For example, if you
are running Go on a Linux system with an x86_64 CPU, the Go build
command will produce a binary file that can be run on Linux systems with
x86_64 CPUs.
2.3. The Example Explained
The first line of a Go program is a package clause. It defines the name
of the package to which the file belongs. In the hello world program,
the package clause is package main. This means that the hello.go
file belongs to the main package.
package main
A package is a collection of Go source files. The source files that
belong to a package can be distributed across multiple files within a
directory. When creating an executable program, the package that
contains the main entry point should be named main. It is
recommended to use lowercase letters for package names.
The second line is intentionally left blank for improved readability.
The third line is an import declaration, which allows access to external
packages from the current package. In the provided example, the fmt
package is imported using this syntax.
import "fmt"
If a package is imported, it must be used somewhere in the source files.
Otherwise, the compiler will generate an error. As shown in the example
above, an import declaration begins with the keyword import followed
by the package name enclosed in double quotes. If multiple packages need
to be imported, they can be grouped together using parentheses for a
more concise and efficient import statement. This is commonly referred
to as a factored import. This is Here is an example of a factored
import:
import (
    "fmt"
    "math"
)
The name of a built-in package is determined by the name specified
within the quotes of the import statement. If the import string is a
path separated by slashes, the name of the package will be the last part
of the string. For instance, the package net/http has the name
http. For third-party vendor packages, the package name should be
verified within the source code.
Names within an imported package can be accessed using the dot operator,
as shown in the example above (fmt.Println). A name is considered
exported if it starts with a capital letter. For instance, the name
Area is an exported name, while area is not exported.
After adding a blank line for readability, the fifth line begins with a
function definition. In this case, it is a special function called
main. A function is a set of instructions, or statements. A function
definition starts with the func keyword, followed by the function
name, parameters enclosed in parentheses, and finally the statements
enclosed in curly brackets. The main function is a special function
that does not take any arguments. The opening curly bracket should be on
the same line as the function definition, and the statements should
start on the next line. An executable program should have only one
main function.
Please note that, parameters are defined in the function declaration, while arguments are the values passed to the function when it is called. Parameters represent the expected inputs, while arguments are the actual values supplied for those inputs.
Inside the main function, we are invoking the Println function that
is provided by the fmt package. By using the dot operator (.),
we can access and use functions from imported packages in our Go
program. In this case, we are using the Println function from the fmt
package to print a message to the console.
fmt.Println("Hello, World!")
The above function call is a complete statement in Go. The Println
function is responsible for printing the specified string to the
standard output of the terminal or console. Additionally, it
automatically appends a new line character at the end of the printed
string.
2.4. Organizing Code
As mentioned earlier, a package in Go consists of multiple source files that are grouped together. These source files can be spread across different files within a directory. In Go, when multiple source files belong to the same package, the variables, functions, types, and constants defined in one source file can be directly referenced from other source files within the same package. This allows for easy sharing and access to code elements across different files within the package.
In a Git repository, it is typical to have one module located at the root. However, if needed, it is possible to include more than one module in the repository. A Go module, on the other hand, represents a collection of Go packages that are released and managed together. By organizing related packages within a module, it becomes easier to maintain and version them as a cohesive unit.
To comprehend the organization of code in Go, it is important to understand the concept of a Go module. In Go, a file called go.mod serves as a declaration for the module path, which is essentially the import path prefix for all packages within the module. The module itself encompasses not only the packages located directly in the directory where the go.mod file resides but also the packages within its subdirectories. This inclusion extends up to the next subdirectory that contains another go.mod file, if such a subdirectory exists within the module structure. This hierarchical approach helps define the scope and boundaries of a Go module and its associated packages.
It is important to note that publishing your code to a remote repository is not a prerequisite for building it. You can define a module locally without associating it with a repository. However, it is considered good practice to organize your code in a way that aligns with the expectation of future publication. This entails maintaining a clean and well-structured codebase, adhering to best practices, and following standard conventions. By doing so, you will be better prepared to share and publish your code in the future, should the need arise.
Each module’s path in Go not only acts as a prefix for import paths of
its packages but also specifies the location where the Go command should
look to download the module. For instance, if you want to download the
module golang.org/x/tools, the Go command will consult the
repository indicated by the URL https://golang.org/x/tools to fetch the
module’s source code. This allows the Go command to retrieve and manage
dependencies efficiently, ensuring that the correct versions of modules
are obtained for your project.
An import path in Go is a string that is used to import a package. It
consists of the module path joined with the subdirectory within the
module where the package is located. For example, if the module
github.com/google/go-cmp contains a package in the directory
cmp/, the import path for that package would be
github.com/google/go-cmp/cmp.
It’s important to note that packages in the Go standard library do not have a module path prefix, as they are part of the standard distribution and are accessible without specifying a module path.
2.5. Basics
2.5.1. Data Types
Data in programming refers to unorganized facts that need to be processed. To make data useful, it is processed and organized. In programming, data types are used to classify and define the nature of the data. Data types are often referred to simply as types. Understanding data types is a fundamental concept in any programming language. In this book, we will often refer to data as values. More complex data types are known as data structures.
Consider an example where you need to work with names of toys in your programs. The actual names of the toys are the data. To represent this data in Go, you can use the data type called string. When writing a string in Go, you can enclose the names within double quotes, like this:
"Sheriff Woody"
"Buzz Lightyear"
"Jessie"
In the hello world example, we used the string “Hello, World!” directly in the source code. This representation of a string value within the source code is called a string literal.
Let’s consider another example. You want to mark whether the toy characters are male or female. This type of data is called Boolean data. Boolean data can only have two values: true or false. In this case, if the toy is male, the value will be true. Otherwise, the value will be false.
Consider a related example, you want to mark whether the toys are male
or not. This type of data is called Boolean data. So, if the toy is
male, the value will be true otherwise false as given below:
{"Sheriff Woody",  true}
{"Buzz Lightyear", true}
{"Jessie",        false}
In addition to string and bool, Go has several other data types such as int, byte, float64, and more. These data types allow you to work with different kinds of values and perform various operations on them.
2.5.2. Variables
Let’s return to the hello world example, where you want to print the “hello world” message three times. To achieve this, you can write the sentence three times, as shown below:
1package main
2
3import "fmt"
4
5func main() {
6    fmt.Println("Hello, World!")
7    fmt.Println("Hello, World!")
8    fmt.Println("Hello, World!")
9}
By repeating the code three times, the “hello world” message will be printed three times.
This is where the concept of variables becomes useful. Instead of using
the literal string three times, you can assign the string value to a
variable and then use that variable throughout your code. A variable
acts as an alias or placeholder for the data it holds. The name of the
variable is called its identifier. Here’s an example where a variable
named hw is used to refer to the “Hello, World!” string literal:
package main

import "fmt"

func main() {
    hw := "Hello, World!"
    fmt.Println(hw)
    fmt.Println(hw)
    fmt.Println(hw)
}
By assigning the string to the variable hw, you can simply use
hw in place of the literal string, making your code more concise and
easier to read.
As you can see in the above example, we are using a special syntax
(:=) between the variable name and the string literal. The colon
character immediately followed by the equal character is used to define
a short variable declaration in Go. However, there is a small caveat:
this short syntax for declaring variables will only work inside a
function definition. The Go compiler automatically identifies the type
of the variable as a string based on the assigned value. This process of
automatically determining the data type is called type inference.
To assign a new value to the variable, you can use the = operator,
as shown in the example below:
package main

import "fmt"

func main() {
    hw := "Hello, World!"
    fmt.Println(hw)
    hw = "Hi, New World!"
    fmt.Println(hw)
}
The output will look like this:
$ go run hello.go
Hello, World!
Hi, New World!
You can also explicitly define the type of a variable instead of using
the := syntax. To define the type of a variable, you can use the
var keyword followed by the name of the variable and its type. Later,
to assign a string value to the hw variable, you can use the =
symbol instead of :=. Here’s how the example can be rewritten:
package main

import "fmt"

func main() {
    var hw string
    hw = "Hello, World!"
    fmt.Println(hw)
    fmt.Println(hw)
    fmt.Println(hw)
}
This code will produce the same output as before.
Variables declared at the package level, also known as global variables, can be accessed from anywhere within the same package. They have a wider scope and can be used across multiple functions.
On the other hand, variables declared at the function level, also known as local variables, have a limited scope and are only accessible within the function where they are declared. They are typically used for temporary storage or calculations within a specific function.
It is important to note that local variables must be used within the function where they are declared. If they are not used, the Go compiler will throw an error during compilation to indicate that the variable is defined but not used. However, if a global variable is declared but not used, there won’t be any compilation error. It is generally considered good practice to remove unused variables to keep the code clean and maintainable.
The keyword var can be used to declare multiple variables. You can
also assign values during variable declaration. Unlike the := syntax
mentioned earlier, variable declarations using the var keyword can be
done at the package level or inside a function.
Here are different ways in which you can declare a variable:
Declaring a variable without assigning a value:
var x int
Declaring a variable and assigning a value:
var y int = 10
Declaring multiple variables of the same type:
var a, b, c int
Declaring and initializing variables of different types:
var name string = "John"
var age int = 25
var isChild bool = false
Declaring variables without specifying the type (type inference):
var z = 3.14
var isActive = false
Short variable declaration (only allowed within functions):
x := 5
y := "Hello"
Factored variable declaration refers to the technique of declaring multiple variables in a single statement. In Go, you can declare multiple variables of the same or different types using the var keyword in a factored declaration.
Here’s an example of a factored variable declaration:
var (
    x = 10
    y = "Hello"
    z = true
)
In the above code, three variables ‘x‘, ‘y‘, and ‘z‘ are declared and initialized with different types and values. The factored declaration allows you to declare multiple variables in a concise and readable manner.
Note that the type of each variable is inferred from the assigned values. If you want to specify the type explicitly, you can do so for the first variable in the list, and the subsequent variables will have the same type.
When declaring a variable in Go without assigning a value, it will be automatically assigned a default “zero” value. The zero value depends on the type of the variable and follows certain rules:
For numeric types such as ‘int‘, ‘int32‘, ‘float64‘, etc., the zero value is ‘0‘.
For Boolean types, the zero value is ‘false‘.
For strings, the zero value is an empty string ‘””`.
Here’s an example that demonstrates the default zero values:
var x int
var y float64
var z bool
var str string

fmt.Println(x)   // Output: 0
fmt.Println(y)   // Output: 0.0
fmt.Println(z)   // Output: false
fmt.Println(str) // Output: ""
In the above code, the variables ‘x‘, ‘y‘, ‘z‘, and ‘str‘ are declared without assigning any value explicitly. As a result, they are automatically initialized with their respective zero values.
Understanding the default zero values is important when working with variables that haven’t been explicitly initialized, as it helps avoid unexpected behavior and provides a starting point for further operations on those variables.
In Go, when naming variables, we used identifiers such as ‘hw‘, ‘name‘, ‘age‘, ‘length‘, and so on. An identifier in Go must adhere to certain rules:
It should start with an alphabet (a-z or A-Z) or an underscore
_.After the first character, it can contain alphanumeric characters (a-z, A-Z, 0-9) and underscores
_.It cannot be a reserved keyword, which are words that have special meaning in the language.
Some examples of reserved keywords we have already encountered include ‘package‘, ‘import‘, ‘func‘, and ‘var‘. These keywords are predefined and serve specific purposes within the language.
In the upcoming sections, we will explore more keywords such as ‘for‘, ‘if‘, and others. It is important to note that these keywords cannot be used as identifiers for variables or other entities in your code.
By following the rules for naming identifiers and avoiding reserved keywords, you can choose meaningful and descriptive names for your variables, making your code more readable and maintainable.
2.5.4. For Loop
Repeating certain process is a common requirement in programming. The
repetition process aiming a result is called iteration. In Go, the
iteration is performed by using the for loop block.
In the previous section about variable, we printed the Hello, World!
message three times. As you can see there, we repeatedly printed the
same message. So, instead of typing the same print statement again and
again, we can use a for loop as given below.
package main

import "fmt"

func main() {
    hw := "Hello, World!"
    for i := 0; i < 3; i++ {
        fmt.Println(hw)
    }
}
The for loop starts with a variable initialization, then semi-colon,
then a condition which evaluate true or false, again one more
semi-colon and an expression to increment value. After these three
parts, the block starts with a curly bracket. You can write any number
of statements within the block. In the above example, we are calling the
Println function from fmt package to print the hello world
message.
In the above example, the value i was initialized an integer value
of zero. In the second part, the condition is checking whether the value
of i is less than 3. Finally, in the last part, the value of i
is incremented by one using the ++ operator. We will look into
operators in another section later in this chapter.
Here is another example for loop to get sum of values starting from
0 up to 10.
package main

import "fmt"

func main() {
    sum := 0
    for i := 0; i < 10; i++ {
        sum += i
    }
    fmt.Println(sum)
}
The initialization and increment part are optional as you can see below.
package main

import "fmt"

func main() {
    sum := 1
    for sum < 1000 {
        sum += sum
    }
    fmt.Println(sum)
}
An infinite loop can be created using a for without any condition as
given below.
package main

func main() {
    for {
    }
}
2.5.5. If
One of the common logic that is required for programming is branching
logic. Based on certain criteria you may need to perform some actions.
This could be a deviation from normal flow of your instructions. Go
provides if conditions for branching logic.
Consider a simple scenario, based on money available you want to buy vehicles. You want to buy a bike, but if more money is available you also want to buy a car.
package main

import "fmt"

func main() {
    money := 10000
    fmt.Println("I am going to buy a bike.")
    if money > 15000 {
        fmt.Println("I am also going to buy a car.")
    }
}
You can save the above program in a file named buy.go and run it
using go run. It’s going to print like this:
$ go run buy.go
I am going to buy a bike.
As you can see, the print statement in the line number 9 didn’t print.
Because that statement is within a condition block. The condition is
money > 15000, which is not correct. You can change the program and
alter the money value in line number 7 to an amount higher than 15000.
Now you can run the program again and see the output.
Now let’s consider another scenario where you either want to buy a bike
or car but not both. The else block associated with if condition
will be useful for this.
package main

import "fmt"

func main() {
    money := 20000
    if money > 15000 {
        fmt.Println("I am going to buy a car.")
    } else {
        fmt.Println("I am going to buy a bike.")
    }
}
You can save the above program in a file named buy2.go and run it
using go run. It’s going to print like this:
$ go run buy2.go
I am going to buy a car.
Similar to for loop, the if statement can start with a short
statement to execute before the condition. See the example given below.
package main

import "fmt"

func main() {
    if money := 20000; money > 15000 {
        fmt.Println("I am going to buy a car.")
    } else {
        fmt.Println("I am going to buy a bike.")
    }
}
A variable that is declared along with if statement is only
available within the if and else blocks.
2.5.6. Function
Function is a collection of statements. Functions enables code reusability. Function can accept arguments and return values. To understand the idea, consider this mathematical function:
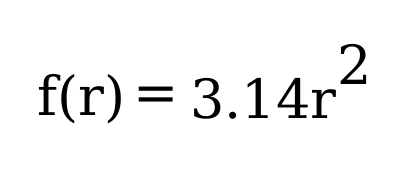
Figure 2.1: Mathematical function for area of a circle
This function square the input value and multiply with 3.14. Depending on the input value the output varies.
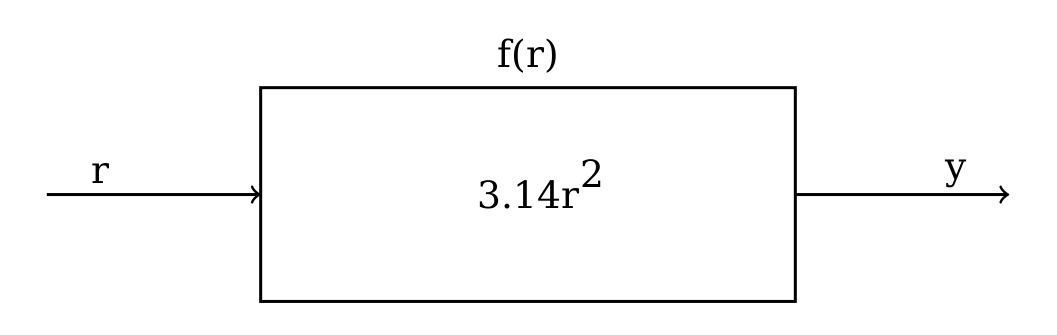
Figure 2.2: Blackbox representation of a function
As you can see in the above diagram, r is the input and y is the
output. A function in Go can take input arguments and perform actions
and return values. A simple implementation of this function in Go looks
like this.
func Area(r float64) float64 {
    return 3.14 * r * r
}
The function declaration starts with func keyword. In the above
example, Area is the function name which can be later used to call
the function. The arguments that can be received by this function is
given within brackets. The line where function definition started should
end with an opening curly bracket. The statements can be written in the
next line on wards until the closing curly bracket.
Here is a complete example with usage of the Area function.
package main

import "fmt"

// Area return the area of a circle for the given radius
func Area(r float64) float64 {
    return 3.14 * r * r
}

func main() {
    area := Area(5.0)
    fmt.Println(area)
}
In the above example, the Area function is called in line number 11
with an argument of 5.0. We are using the short variable
declaration. The type of the variable area will be float64 as
the Area function returns with that type.
2.5.7. Operators
Programming languages use operators to simplify the usage. Operators
behave more or less like functions. More specifically, operators combine
operands to form expressions. We have already seen few operators like
:=, =, +=, ++, *, > and <.
The :=, =, += are assignment operators. The * is the
multiplication operator. The > and < are comparison operators.
Sometimes logical conditions should be checked to proceed with certain steps. Logical operators does these kind kind of checking. Let’s say you want to check whether a particular value is divisible by 3 and 5. You can do it like this.
if i%3 == 0 {
    if i%5 == 0 {
        // statements goes here
    }
}
The same thing can be achieved using conditional AND logical operator
(&&) like this.
if i%3 == 0 && i%5 == 0 {
    // statements goes here
}
Apart from the conditional AND, there are conditional OR (||) and
NOT (!) logical operators. We will see more about operators in the
next chapter.
2.5.8. Slices
Slice is a sequence of values of the same type. In computer science
terminology, it’s a homogeneous aggregate data type. So, a slice can
contain elements of only one type of data. However, it can hold a
varying number of elements. It can expand and shrink the number of
values. []T is a slice with elements of type T.
The number of values in the slice is called the length of that slice.
The slice type []T is a slice of type T. Here is an example
slice of color names:
colors := []string{"Red", "Green", "Blue"}
In the above example, the length of slice is 3 and the slice values
are string data. The len function gives the length of slice. See
this complete example:
package main

import "fmt"

func main() {
    colors := []string{"Red", "Green", "Blue"}
    fmt.Println("Len:", len(colors))
    for i, v := range colors {
        fmt.Println(i, v)
    }
}
If you save the above program in a file named colors.go and run it,
you will get output like this:
$ go run colors.go
Len: 3
0 Red
1 Green
2 Blue
The range clause loop over through elements in a variety of data
structures including slice and map. Range gives index and the value. In
the above example, the index is assigned to i and value to v
variables. As you can see above, each iteration change the value of
i & v.
If you are not interested in the index but just the value of string, you can use blank identifier (variable). In Go, underscore is considered as blank identifier which you need not to define and you can assign anything to it. See the example written below to print each string ignoring the index.
package main

import "fmt"

func main() {
    colors := []string{"Red", "Green", "Blue"}
    fmt.Println("Len:", len(colors))
    for _, v := range colors {
        fmt.Println(v)
    }
}
If you just want to get the index without value, you can use just use one variable to the left of range clause as give below.
package main

import "fmt"

func main() {
    colors := []string{"Red", "Green", "Blue"}
    fmt.Println("Len:", len(colors))
    for i := range colors {
        fmt.Println(i, colors[i])
    }
}
In the above example, we are accessing the value using the index syntax:
colors[i].
2.5.9. Maps
Map is another commonly used complex data structure in Go. Map is an implementation of hash table which is available in many very high level languages. The data organized like key value pairs. A typical map type looks like this:
map[KeyType]ValueType
A KeyType can be any type that is comparable using the comparison
operators. The ValueType can be any data type including another map.
It is possible add any numbers of key value pairs to the map.
Here is a map definition with some values initialized.
var fruits = map[string]int{
      "Apple":  45,
      "Mango":  24,
      "Orange": 34,
  }
To access a value corresponding to a key, you can use this syntax:
mangoCount := fruits["Mango"]
If the key doesn’t exist, a zero value will be returned. For example, in
the below example, value of pineappleCount is going be 0.
pineappleCount := fruits["Pineapple"]
More about maps will be explained in the data structure chapter.
2.6. Exercises
Exercise 1: Print multiples of 5 for all even numbers below 10
Solution:
This exercise requires getting all even numbers numbers below 10. As we
we have seen above, a for loop can be used to get all numbers. Then
if condition can be used with % operator to check whether the
number is even or not. The % operator given the gives the remainder
and we can check it is zero or not for modulus 2. If the number is even
use the * operator to multiply with 5.
Here is the program.
package main

import "fmt"

func main() {
    for i := 1; i < 10; i++ {
        if i%2 == 0 {
            fmt.Println(i * 5)
        }
    }
}
Exercise 2: Create a function to reverse a string
Solution:
package main

import "fmt"

func Reverse(s string) string {
    var r string
    for _, c := range s {
        r = string(c) + r
    }
    return r
}

func main() {
    hw := "Hello, World!"
    rhw := Reverse(hw)
    fmt.Println(rhw)
}
Exercise 3: Find sum of all numbers below 50 completely divisible by 2 or 3 (i.e., remainder 0).
Hint: The numbers completely divisible by 2 or 3 are 2, 3, 4, 6, 8, 9 … 45, 46, 48.
Solution:
package main

import "fmt"

func main() {
    sum := 0
    for i := 1; i < 50; i++ {
        if i%2 == 0 {
            sum = sum + i
        } else {
            if i%3 == 0 {
                sum = sum + i
            }
        }
    }
    fmt.Println("Sum:", sum)
}
The logic can be simplified using a conditional OR operator.
package main

import "fmt"

func main() {
    sum := 0
    for i := 1; i < 50; i++ {
        if i%2 == 0 || i%3 == 0 {
            sum = sum + i
        }
    }
    fmt.Println("Sum:", sum)
}
2.6.1. Additional Exercises
Answers to these additional exercises are given in the Appendix A.
Problem 1: Write a function to check whether the first letter in a given string is capital letters in English (A,B,C,D etc).
Hint: The signature of the function definition could be like this:
func StartsCapital(s string) bool. If the function returns true,
the string passed starts with a capital letter.
Problem 2: Write a function to generate Fibonacci numbers below a given value.
Hint: Suggested function signature: func Fib(n int). This function
can print the values.
2.7. Summary
We began with a “hello world” program and briefly explained it. This chapter then introduced a few basic topics in the Go programming language. We covered data types, variables, comments, for loops, range clauses, if statements, functions, operators, slices, and maps. The following chapters will explain the fundamental concepts in more detail.
2.5.3. Comments
Writing documentation helps the users to understand the code better. Go provides syntax to write documentation in the form of comments. The comments will be written along with source code. Comments are ignored by the compiler. Usually comments are written for two purpose:
To explain complex logic or remarks about part of code
Application programming interface (API) documentation
There are two kinds of comments, the one form is a multi-line comment and the other form only allows single line comment.
The multi-line comment starts with
/*and ends with*/. And everything in between is considered as comments.Here is a multi-line comment to document the package named
plus. As you can see here, the comment is used to give a brief description about the package and two example usages are also given.The other form of comments is inline comments and it starts with two forward slashes (
//). All the characters till end of line is treated as comments. Even if you have any valid code within comment, it will not be considered by compiler to produce the executable binary. Here is an example line comment:In the above example the first line is a line comment. The “godoc” and similar tool treated this comment as an API documentation.
There is another comment in the line where name equality with empty string is checked. These kind of comment helps the reader of source code to understand what that attribute is used for.